Master Auto-GPT installation with this definitive guide, transforming you from beginner to AI expert. Learn essential steps including Python setup, API configuration, and terminal commands for creating autonomous assistants.
My Auto-GPT Installation Journey: From Zero to AI Assistant 🚀
OMG you guys! I just spent the whole weekend setting up Auto-GPT and it's absolutely mind-blowing! 🤯 As someone who's been obsessed with ChatGPT since it dropped, discovering that I could create my own autonomous AI assistant felt like unlocking a superpower. Let me walk you through my entire installation experience - it's easier than you think!

Step-by-Step Installation Guide ️
1. Python 3 Setup - The Foundation
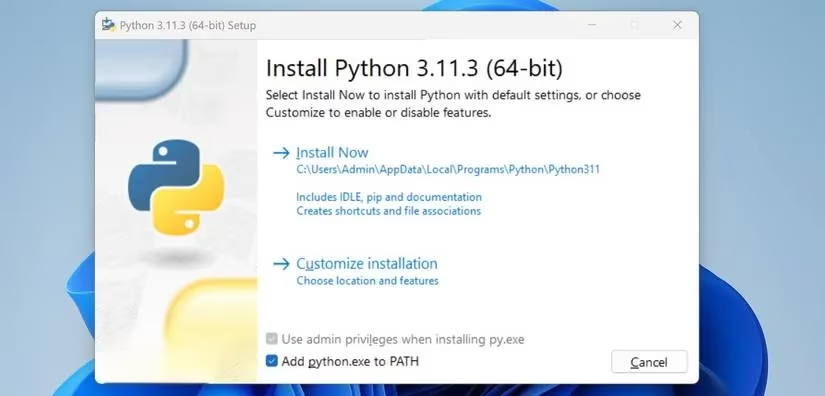
First things first, you NEED Python 3. I was low-key nervous about this part, but it turned out to be super straightforward. Just head to the Python website and download the latest version. Pro tip: DON'T FORGET to tick that "Add python.exe to PATH" box during installation! This little checkbox saves you from so many headaches later.
2. Getting Auto-GPT from GitHub
Next up, grab Auto-GPT from GitHub. For my Windows folks, download the Source code.zip file. Mac/Linux users should get Source code.tar.gz. I just extracted the folder to my desktop - no fancy directory needed!
3. The All-Important API Key 🔑
This is where things get real! You need an OpenAI API key (separate from your ChatGPT account). After registering on OpenAI's platform:
-
Click Personal → View API keys
-
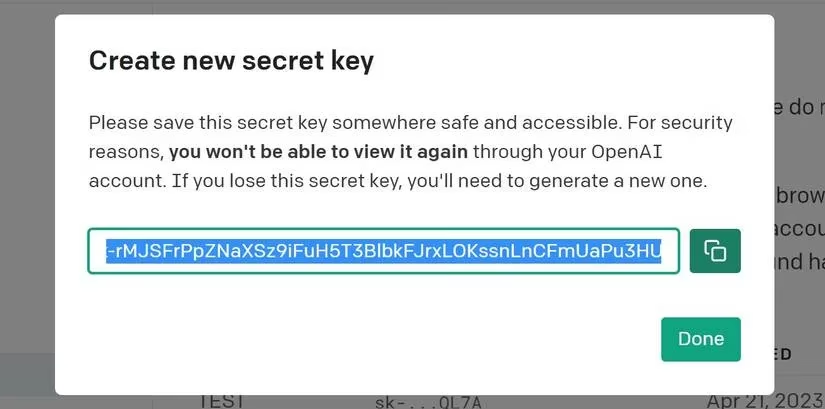
Create a new secret key
-
Name it something memorable (I called mine "AutoGPT-Experiments")
-
COPY THAT KEY immediately - you won't see it again!
4. Configuration Magic ✨
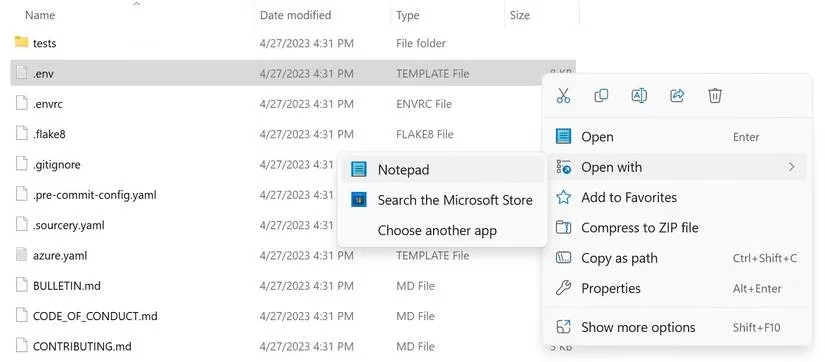
Navigate to your Auto-GPT folder and find the .env.template file. Rename it to .env and open it with any text editor. Replace your-openai-api-key with your actual API key. This file is your AI's brain - handle with care!
5. Terminal Time - Installing Dependencies
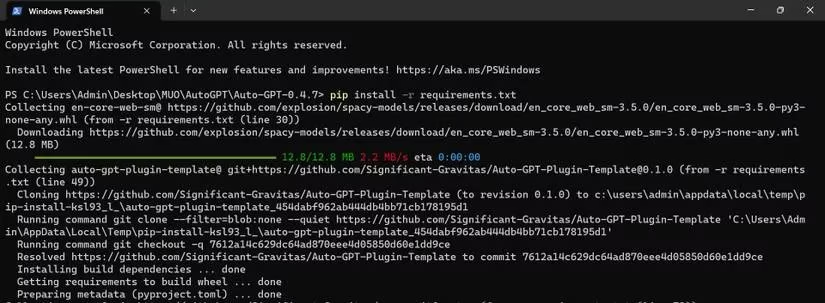
Right-click your Auto-GPT folder and select "Open in Terminal". Run this magical command:
pip install -r requirements.txt
Your terminal will download all the necessary packages. Grab a coffee ☕ - this might take a few minutes!
6. Launch Your AI!
Finally, run:
python -m autogpt
BOOM! You're in! The interface will greet you with options for Manual or Automatic mode.
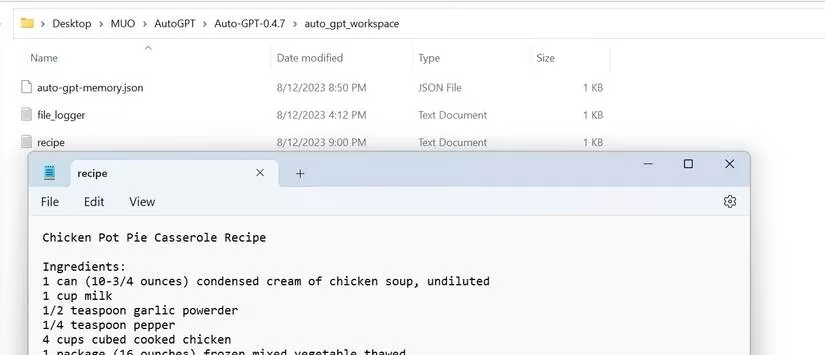
My First Auto-GPT Experience: Recipe Generator 👩🍳
I decided to test Auto-GPT by creating a "Recipe-Generator" assistant. Here's how I set it up:
AI Name: Recipe-Generator
Role: Create recipes using top 5 available US ingredients
Goals:
-
Research common US kitchen ingredients
-
Create original, easy-to-follow recipes
-
Ensure nutritional balance
-
Save recipe as TXT file
-
Shutdown after completion

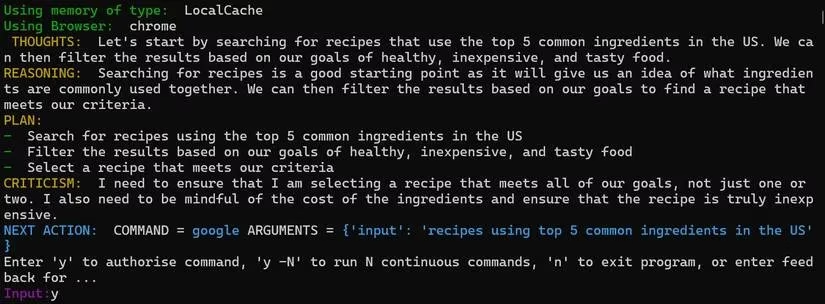
Watching the AI think was absolutely fascinating! It shows its:
-
💭 Thoughts: Internal reasoning process
-
Reasoning: Logical steps it's taking
-
📋 Plan: Action roadmap
-
⚠️ Criticism: Self-evaluation of its approach
Pro Tips I Learned the Hard Way 💡
Manual vs Automatic Mode
-
Automatic: Great for beginners - AI handles everything
-
Manual: My personal preference - you control naming, role, and goals
To activate Manual mode, use:
python -m autogpt --manual
Authorization System
Auto-GPT asks for permission before each action. You can:
-
Type "y" for single approval
-
Type "y -5" to authorize 5 consecutive actions
-
ALWAYS read the AI's plan before approving!
Handling AI "Hallucinations"
Sometimes the AI gets stuck in loops (mine repeated the same recipe search 3 times!). When this happens:
-
Provide clear feedback like "Skip browsing and create output"
-
The AI will adjust based on your guidance
-
Remember GPT models can occasionally output false information
Current Limitations & Real Talk 🤔
After extensive testing, here's the tea:
The Good:
-
Free internet access (unlike ChatGPT!)
-
Autonomous goal completion
-
Continuous development (140k+ GitHub stars!)
The Challenges:
-
Struggles with complex tasks
-
Can get stuck in reasoning loops
-
GPT-4 context limit (8k tokens)
-
Cost management needed for API usage
Final Thoughts & 2025 Outlook 🌟
Auto-GPT is definitely still in its "experimental phase" - not ready for professional use yet. But for learning and experimentation? Absolutely worth it! The development community is super active, and with GPT-4's 32K model on the horizon, the future looks bright.
My verdict: If you're tech-curious and want to peek into the future of autonomous AI, Auto-GPT is your golden ticket. Just manage your expectations and have fun with it!
Have you tried Auto-GPT yet? What crazy projects are you working on? Share your experiences below! 👇
Disclaimer: This is for educational purposes only. Always monitor your AI's actions and set API usage limits!